

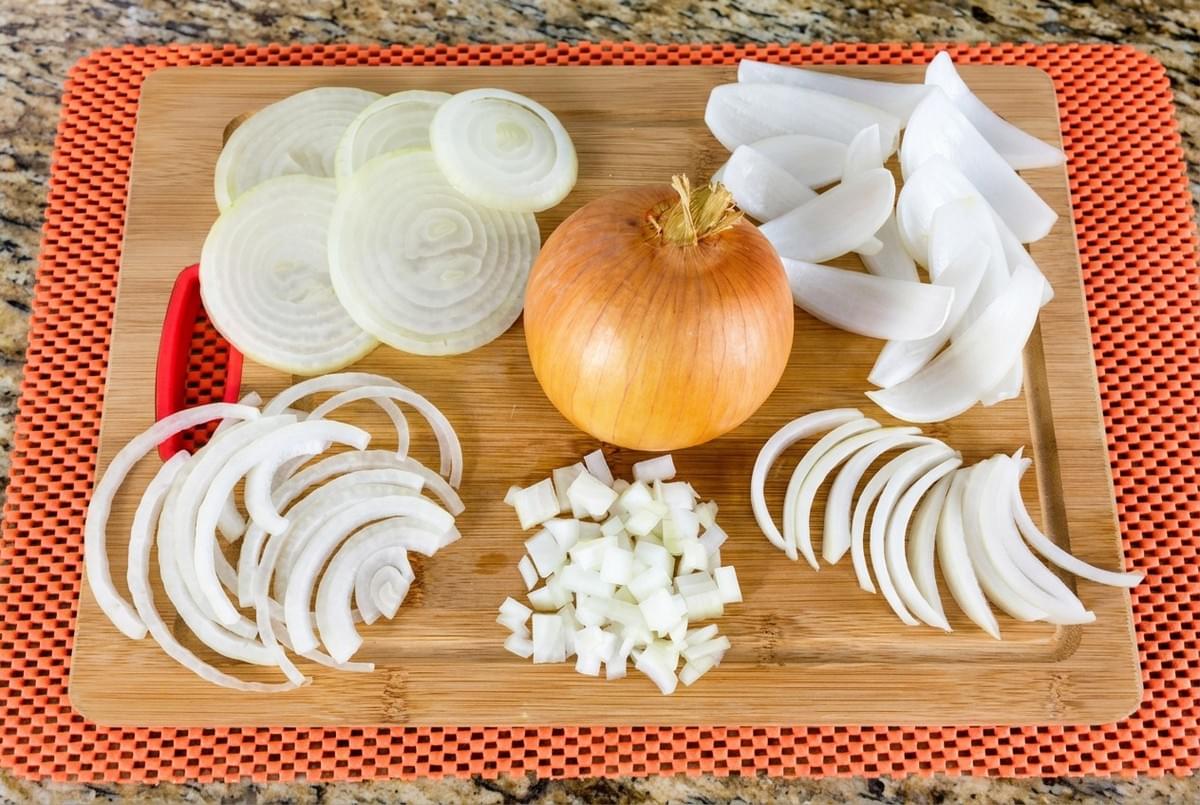
An onion rests on a cutting board. It is papery and round, and it will not stay still for long unless you give it a reason to.
Most recipes begin here. Before the pan is hot or the pot is filled, someone has to decide how this onion will be cut. That decision matters more than it first appears.
The way you slice an onion shapes how it cooks, how it feels in your mouth, and how it looks on the plate. A thin ring draped over a burger behaves differently from a half-moon softening in a soup. A strip cut along the onion's natural lines keeps more of its shape in a braise than one cut across them.
This guide covers three practical cuts: rings, half-moons, and lengthwise slices. Each one is a skill you can return to again and again, across many dishes and many cuisines. None of them requires speed. They require attention, a sharp knife, and a stable board.
Tools and Preparation
Choosing a Good Onion
Start with a firm onion. Press it gently with your thumb. It should feel solid all the way around, with dry, papery skin and no soft spots, dark patches, or sprouting green shoots at the top.
Firmness is not only about freshness. A firm onion holds together under the knife, which makes clean, even slices much easier. A soft onion tends to compress and slide.
Yellow, white, and red onions can all be sliced using the methods below.
Setting Up Your Board and Knife
You need two things: a cutting board that does not move and a sharp chef's knife.
Stabilize the board. Place a damp paper towel or a thin, damp kitchen towel flat underneath it. The moisture grips both the board and the counter, so the board stays in place while you work. A board that shifts even slightly can cause the knife to slip.
Use a sharp knife. This may sound backward, but a sharp knife is generally safer than a dull one. A sharp blade cuts with light pressure. A dull blade needs force, and force is what makes knives skid off a smooth onion skin. An 8-inch (20 cm) chef's knife suits most onions, though a 6-inch (15 cm) knife can feel more manageable if you are new to cutting.
Keep the board clean and clear. Move peels and trimmed ends aside as you go, so you always have a flat, open surface to work on.
Knowing the Root and Stem Ends
Every onion has two ends, and learning to tell them apart is the foundation of all three cuts.
- The root end is the flat, slightly hairy end where small, dry roots grow. The layers of the onion are joined together here.
- The stem end is the pointed or narrower end, where the green shoot once grew.
The root end matters because it acts like a binding. When you leave it intact, the layers stay connected, and the onion holds together while you cut. When you remove it, the layers loosen and fall apart.
Peeling the Onion
- Lay the onion on its side and trim about 1/2 inch (1.25 cm) from the stem end.
- If your method calls for halving the onion, cut it in half through the root first. Peeling is easier once the onion is halved, because the skin lifts away from a flat edge.
- Use your fingertips or the tip of the knife to catch the dry outer skin and pull it back toward the root.
- If the first layer under the skin is tough, dry, or blemished, remove it too.
Leave the root end on for now. In most cases, it is the last thing you trim, if you trim it at all.
Safe Knife Handling
Two hands do two different jobs. One holds the knife. The other guides the onion.
Hold the knife with a pinch grip. Grip the handle with your lower three fingers, then pinch the base of the blade between your thumb and the side of your index finger. This gives you more control than holding the handle alone.
Guide the onion with a claw grip. Curl the fingertips of your guiding hand inward, as though lightly holding a ball. Rest your fingertips on the onion with the knuckles slightly forward. The flat side of the blade can then rest against your knuckles as you cut, and your fingertips stay tucked safely behind it.
Always cut on a flat surface. A round onion rolls. Each method below begins by creating a flat side, so the onion sits still on the board before you make any slices.
Method 1: Rings
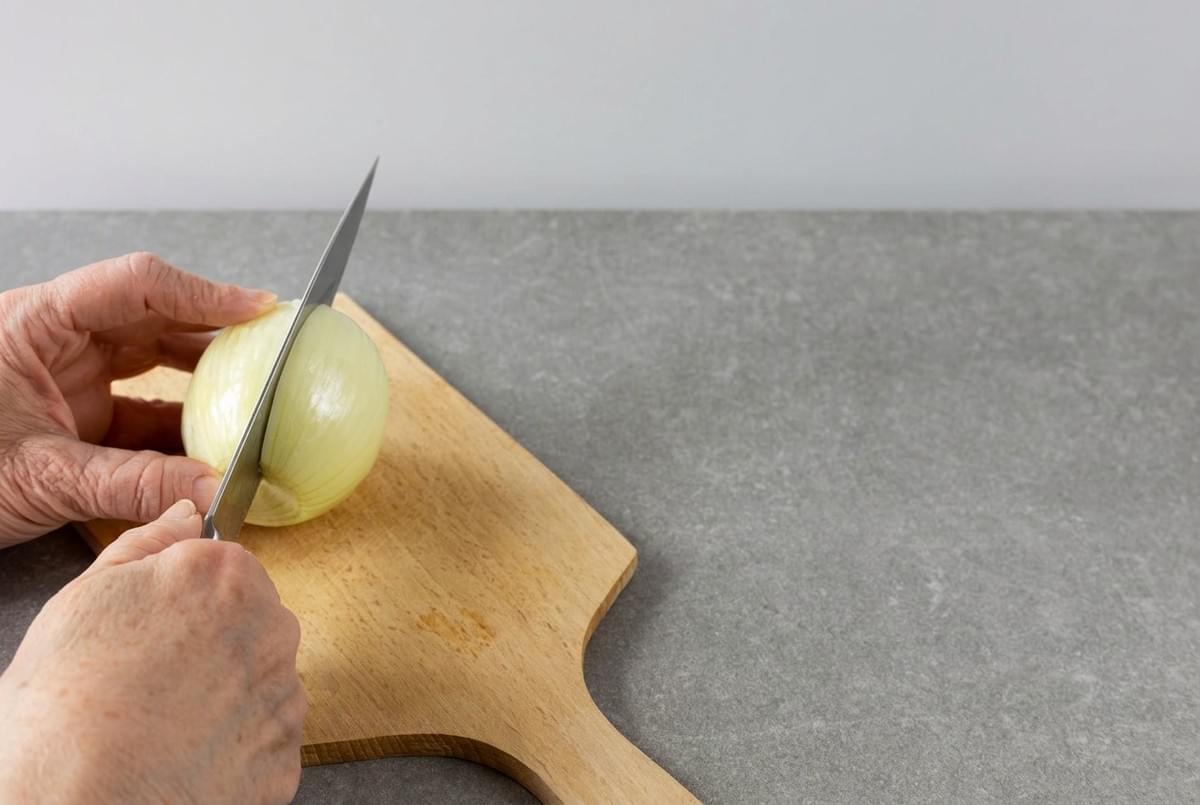
Rings are crosswise slices taken across the onion's width. Each slice is a set of nested circles, which separate into individual rings when pressed gently.
Orientation and Shape
For rings, the onion lies on its side, with the root and stem pointing left and right. The knife moves straight down, cutting across the onion's layers.
The challenge is stability. A whole round onion on its side wants to roll. So before slicing, you create a flat base.
Step-by-Step
- Trim the stem end. Slice about 1/2 inch (1.25 cm) from the stem end and peel away the skin. Leave the root end on.
- Create a flat base. Lay the onion on its side. Carefully cut a very thin sliver, about 1/4 inch (6 mm) deep, from one long side of the onion. This sacrifices a small piece but gives you a steady base.
- Set it down. Turn the onion so it rests on that flat surface. Press lightly. It should not rock or roll.
- Position your hands. Hold the onion near the root end with a claw grip. The root end acts as your handle.
- Slice crosswise. Starting at the trimmed stem end, cut straight down through the onion. Move your guiding hand back slightly after each slice.
- Stop before your fingers get close. When roughly 1 inch (2.5 cm) of onion remains near the root, stop. Set that piece aside for another use.
- Separate the rings. Press gently on each slice with your fingers, and the rings will pop apart.
Thickness and Uses
- Thin rings, about 1/8 inch (3 mm): Good raw on sandwiches, burgers, and salads. Thin rings are tender and less sharp to bite into.
- Medium rings, about 1/4 inch (6 mm): Useful for quick pickling, where the brine can soak in evenly.
- Thick rings, about 1/2 inch (1.25 cm): Suited to battered onion rings or grilling, since they hold their shape over strong heat.
Rings work in these dishes because they keep the onion's full, round form. They are easy to layer and easy to see.
Method 2: Half-Moons
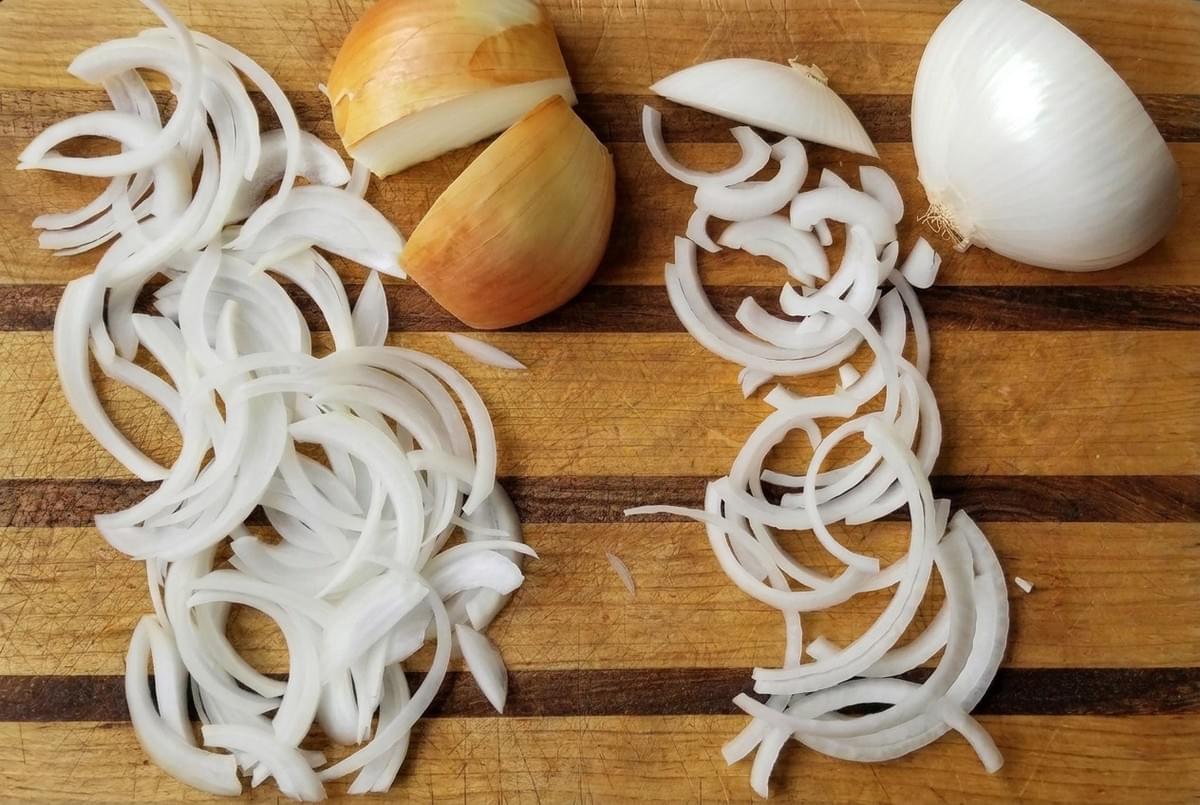
Half-moons begin by halving the onion through the root, then slicing it crosswise. Each slice forms a curved arc of layers.
Orientation and Shape
Halving the onion gives you a large, flat surface right away. This makes half-moons one of the most stable and beginner-friendly cuts.
Step-by-Step
- Trim the stem end. Slice about 1/2 inch (1.25 cm) from the stem end.
- Halve through the root. Stand the onion on its trimmed end, or lay it on its side, and cut straight down through the center of the root. Each half should contain part of the root.
- Peel. Pull away the skin from each half.
- Set it flat. Place one half cut side down on the board. It will sit firmly.
- Turn it sideways. Rotate the onion so the root and stem ends point left and right.
- Slice crosswise. Using a claw grip, cut straight down across the onion, beginning at the stem end and working toward the root.
- Stop near the root. When the remaining piece becomes too small to hold comfortably, stop and set it aside.
- Repeat with the second half.
Thickness and Uses
- Thin, about 1/8 inch (3 mm): Suited to slow cooking, such as caramelized onions, where the slices soften and melt into a jammy mass.
- Medium, about 1/4 inch (6 mm): A practical everyday thickness for sautéing, soups, stews, and curries.
Half-moons work well in these dishes because they cook relatively evenly and tend to soften as they go.
Method 3: Lengthwise Slices
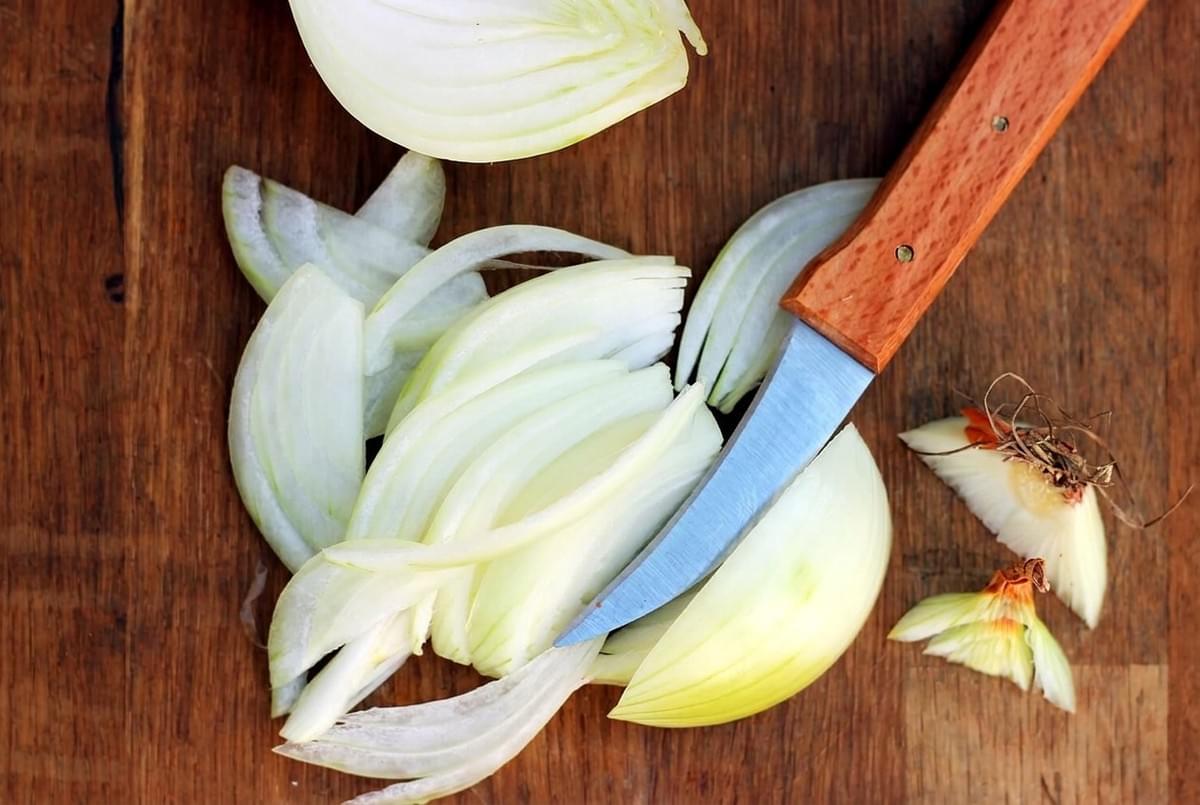
Lengthwise slices follow the onion's natural lines, cutting from root to stem rather than across. The result is a strip or, if the root stays attached, a wedge.
Orientation and Shape
Look closely at a halved onion and you will see faint lines running from root to stem. Lengthwise slicing follows these lines. Because the knife travels along the onion's structure, the slices tend to hold their shape well during cooking.
Step-by-Step for Strips
- Halve and peel. Trim the stem end, cut the onion in half through the root, and peel each half.
- Set it flat. Place one half cut side down, with the root end pointing toward you.
- Remove the root. Make two short angled cuts on either side of the root, forming a small V, and lift it out. This frees the layers so the strips separate cleanly.
- Slice along the lines. Begin at one curved side. Cut from root to stem, following the lines. As you move toward the center, tilt the knife slightly so each cut points toward the middle of the onion, like the spokes of a wheel. This keeps the strips more consistent in width.
- Continue across the half, then repeat with the other.
Step-by-Step for Wedges
- Halve and peel, but keep the root end intact.
- Set the half flat with the root pointing away from you.
- Cut through the root. Make angled cuts from the center outward, through the root, to create 3 or 4 wedges per half. Each wedge stays held together by its piece of root.
Thickness and Uses
- Thin strips, about 1/8 inch (3 mm): Useful in stir-fries and fajitas, where onions should stay distinct and slightly tender.
- Medium strips, about 1/4 inch (6 mm): Suited to braises and stews that cook for a long time, since the strips keep some structure.
- Wedges: Good for roasting trays and skewers. The root keeps each piece together over high heat.
Choosing the Right Cut
Each cut leans toward certain results. These are tendencies, not strict rules.
Cutting direction. Crosswise cuts (rings and half-moons) slice across the onion's structure. They tend to soften and break down more readily, which is helpful when you want onions to melt into a sauce. Lengthwise cuts follow the structure. They tend to hold their shape and keep a little more bite.
Thickness. Thinner slices cook faster and feel more delicate. Thicker slices take longer and keep more texture. Whatever thickness you choose, keeping slices similar to one another is what helps them cook at the same pace.
Appearance. Rings show off the onion's round form. Half-moons look relaxed and familiar in everyday cooking. Lengthwise strips appear neat and even, and wedges look generous on a roasting tray.
If you are unsure, consider the dish. Ask whether the onion should disappear into it or remain visible. That question usually points toward the right cut.
Common Questions and Troubleshooting
How can I keep slices even?
Move your guiding hand back by the same small distance after each cut. The knife follows your knuckles, so steady hand movement leads to steady slices. Slow down. Evenness comes from rhythm, not speed. A sharp knife also helps, since it cuts cleanly rather than crushing.
What if the onion slips or gets too small?
If the onion begins to slide, stop. Check that you are cutting on a flat side and that the board is still steady. Dry the onion's surface and your hands if they have become slick.
When the remaining piece is too small to hold with a claw grip, set it aside rather than pushing on. Small ends can be chopped roughly and added to soups, stocks, or sauces. Your fingertips matter more than a few extra slices.
Why do onions make people cry?
Onions contain sulfur compounds stored safely within their cells. When a knife breaks those cells, enzymes are released and react with the compounds. This reaction produces a volatile gas that drifts upward. When it reaches your eyes, it irritates them, and your eyes respond with tears.
A few approaches may help reduce this, though none is guaranteed:
- Use a sharp knife. Clean cuts may damage fewer cells than crushing ones.
- Chill the onion. Refrigerating it for about 30 minutes before cutting may slow the release of the gas.
- Improve airflow. Working near an open window or a fan can help carry the gas away from your face.
- Leave the root for last. Some cooks find that keeping the root intact as long as possible reduces irritation.
Results vary from person to person. If your eyes still water, that is normal.
How should cut onions be stored?
Once an onion is cut, it should be refrigerated. Place leftover slices in an airtight container or sealed bag, and store them in the refrigerator at 40°F (4°C) or below. Cut onions are best used within about 7 days.
Do not leave cut onions sitting out for long. Food-safety guidance identifies the range between 40°F and 140°F (4°C to 60°C) as a "danger zone," where bacteria can multiply quickly. Refrigerate cut onions within 2 hours, or within 1 hour if the room is above 90°F (32°C). If cut onions look slimy or smell unpleasant, discard them.
Finding Your Rhythm
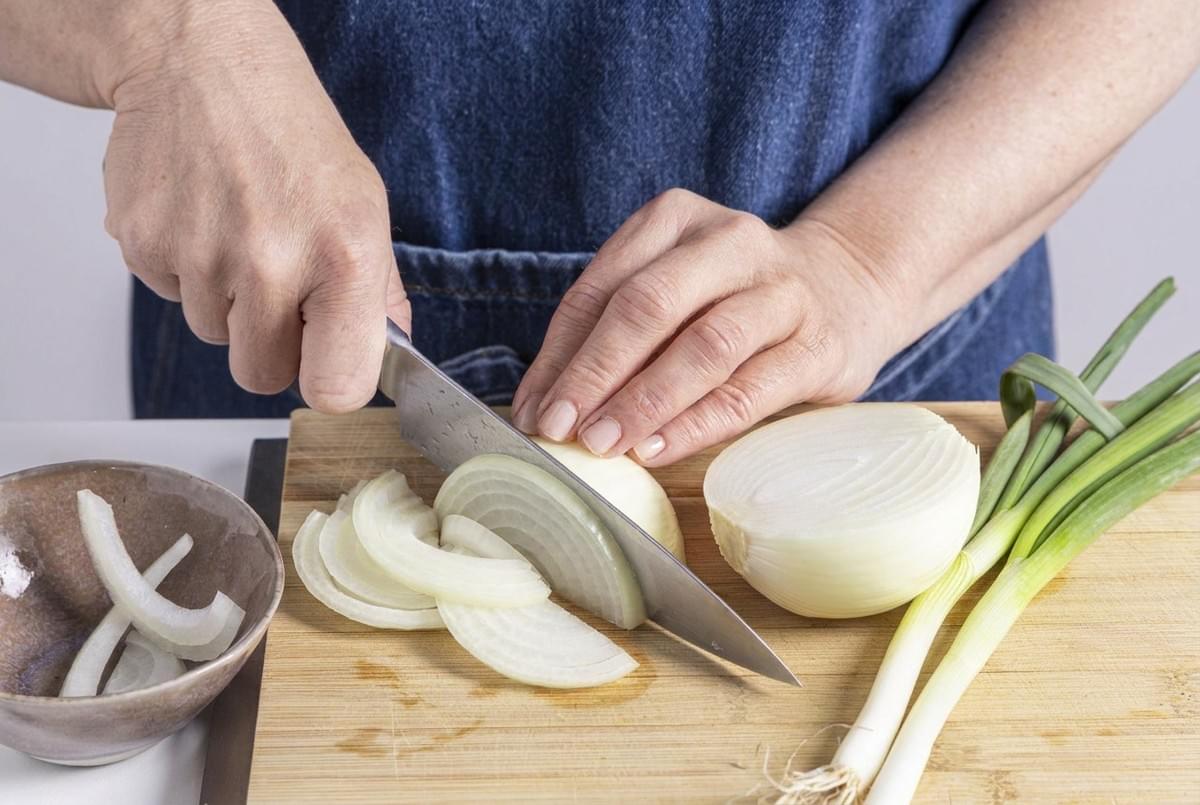
Three cuts. Rings for raw layers and crisp frying. Half-moons for soups, sautés, and slow cooking. Lengthwise strips and wedges for stir-fries, braises, and roasting trays.
Choose one to practice this week. Cut slowly. Notice how the onion sits on the board, how the knife meets your knuckles, how the slices fall.
Over time, the motions become familiar. The board stays steady, the slices grow even, and the decision about which cut to use starts to feel natural.
Begin wherever you are. The onion will wait.
